

Beware! THIS WILL ALMOST DEFINITELY VOID YOUR WARRANTY! So if you are like a bull in a china shop, don’t do this!
Also, I take no responsibility if you end up jacking up your mouse. Use caution, common sense, and patience when doing these kind of things.
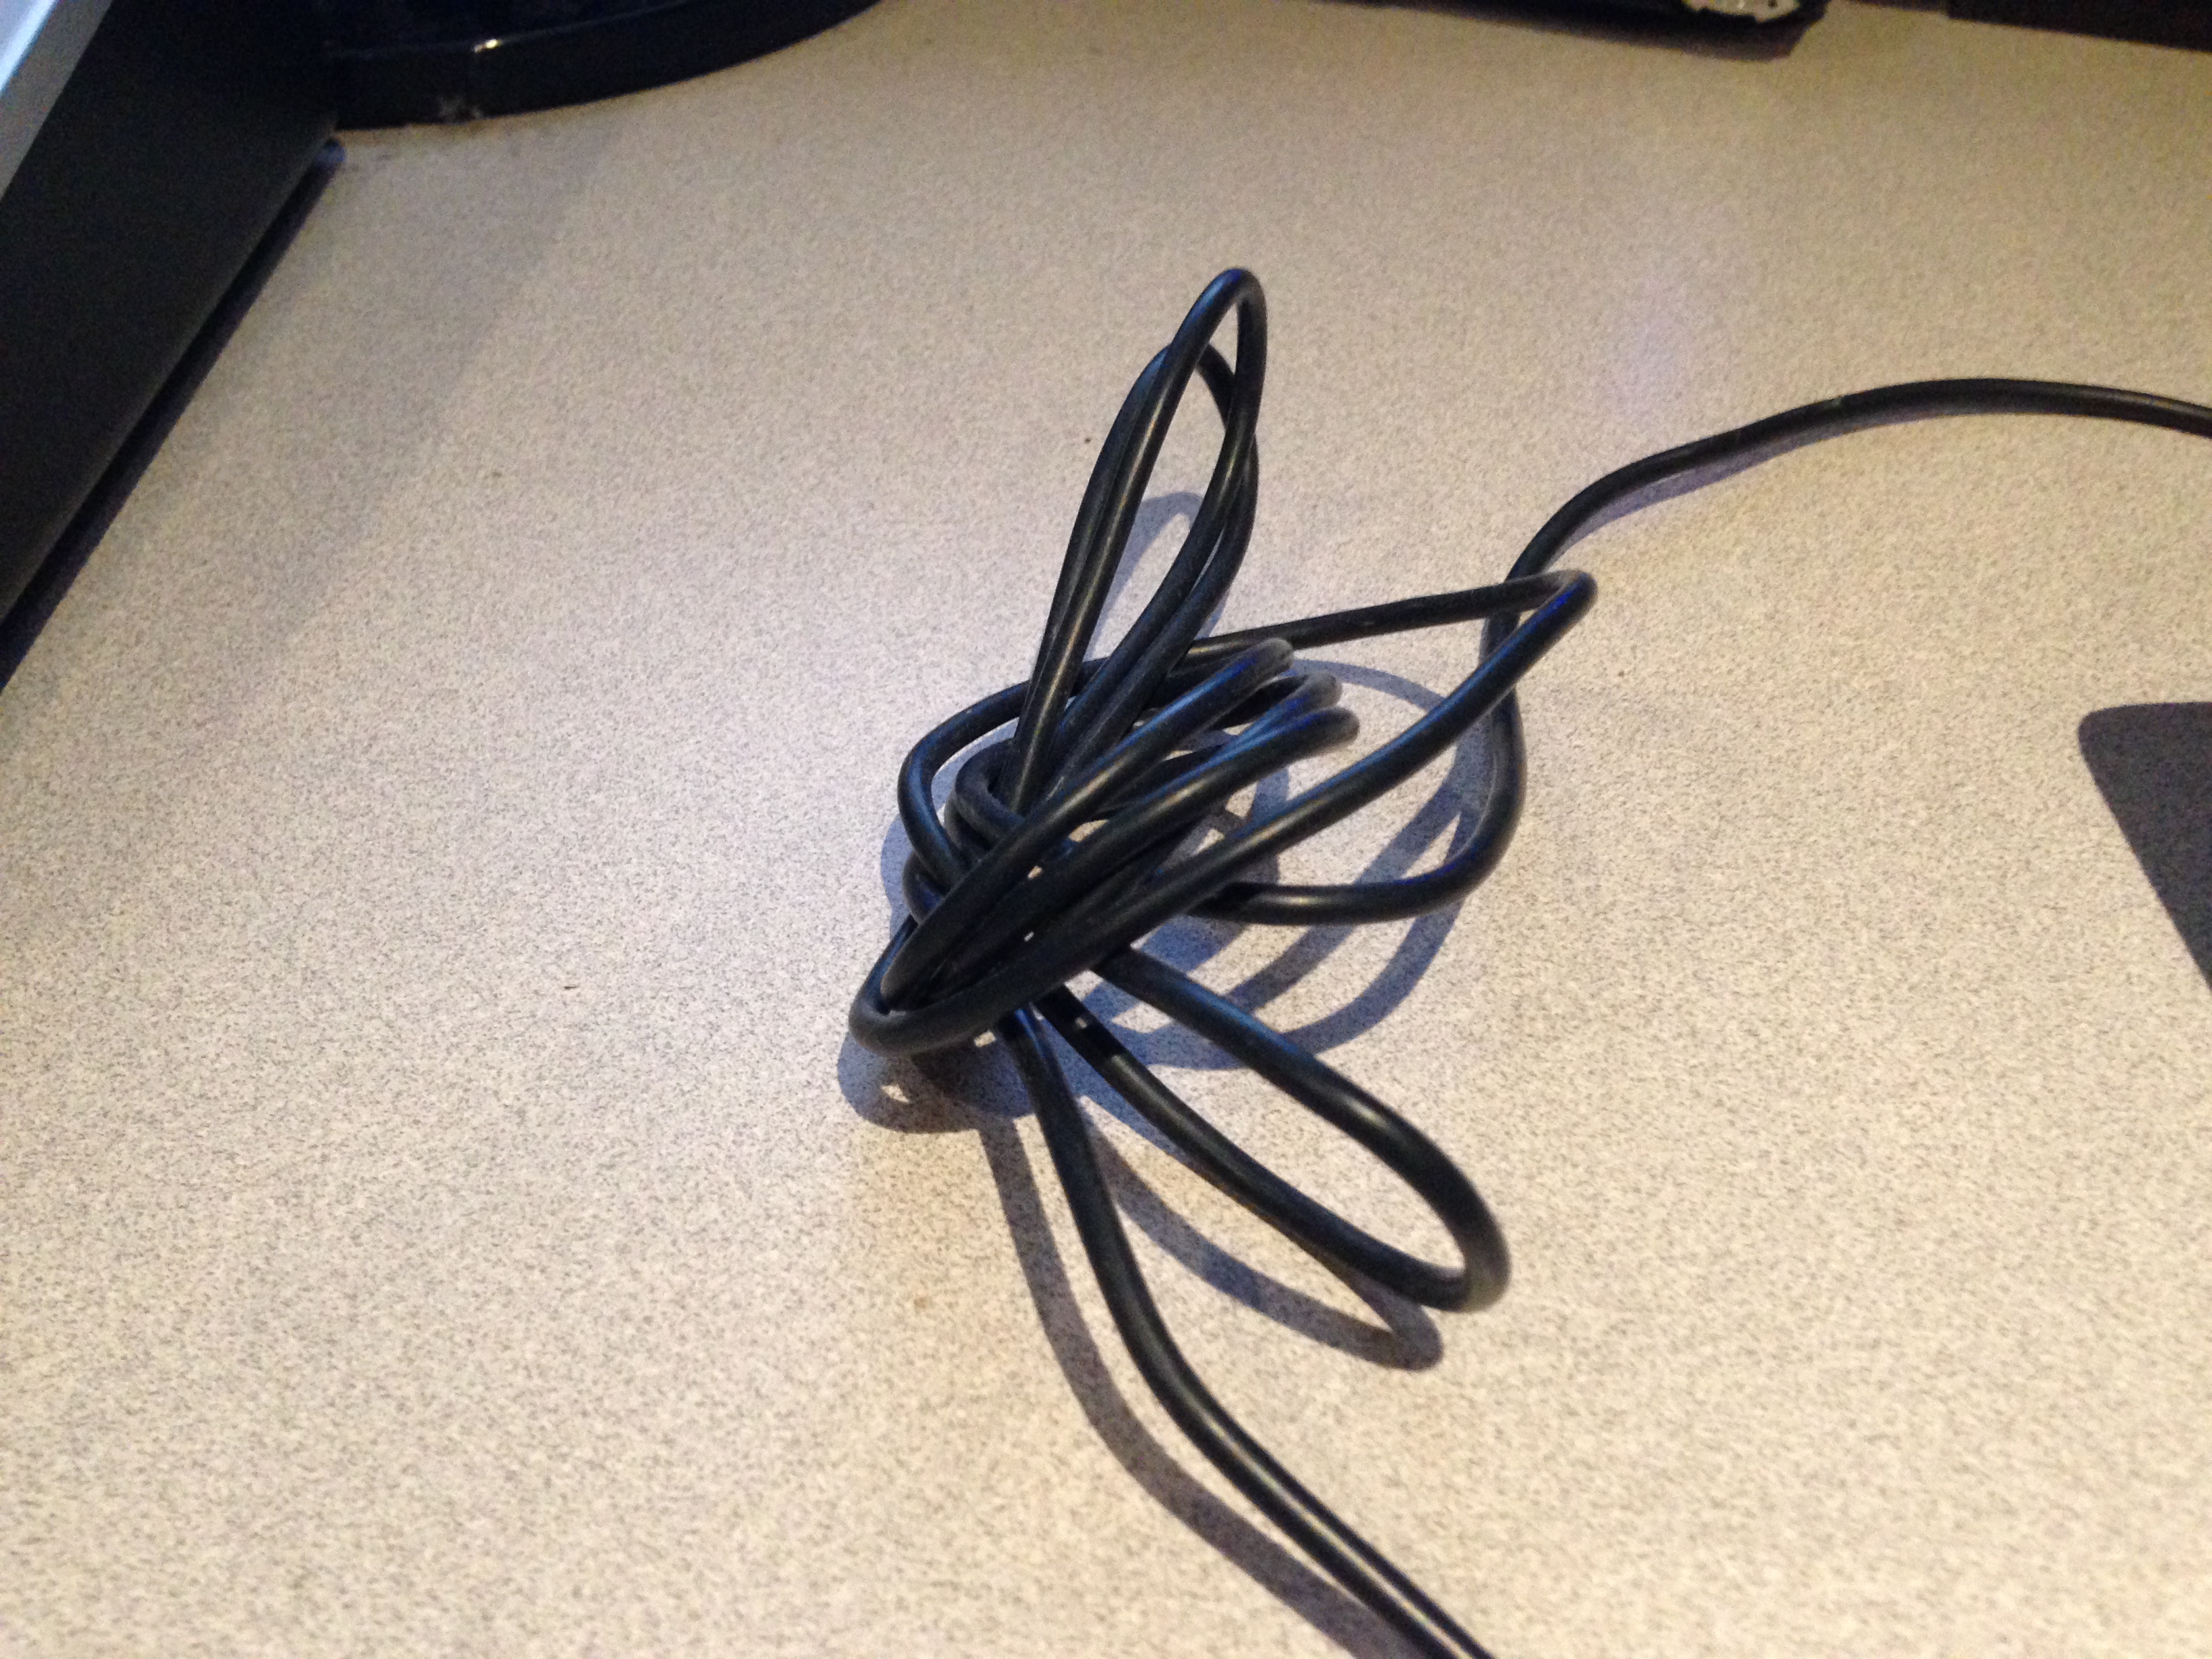
As an electronic musician I HATE CABLES! They are a necessary evil that are used in almost every step of creating and performing music. I especially despise longer cables than are needed. I also love my Kensington Expert Mouse even though it has an almost 6′ long usb cable. It plugs into my keyboard which is, at all times, 6″ away from the mouse. I knotted the cable and that kept it mostly out of my way, but it was unsightly.

I got to thinking if it was possible to shorten the cable.
I came up with two ideas. The first was to cut the wire, remove part of the length, solder the severed sections, and cover with a bit of heat shrink insulation. The second and less permanent idea came to me as I was watching this disassembly video. I noticed how much spare room was actually inside the case. I could coil the cable inside and be done with it!
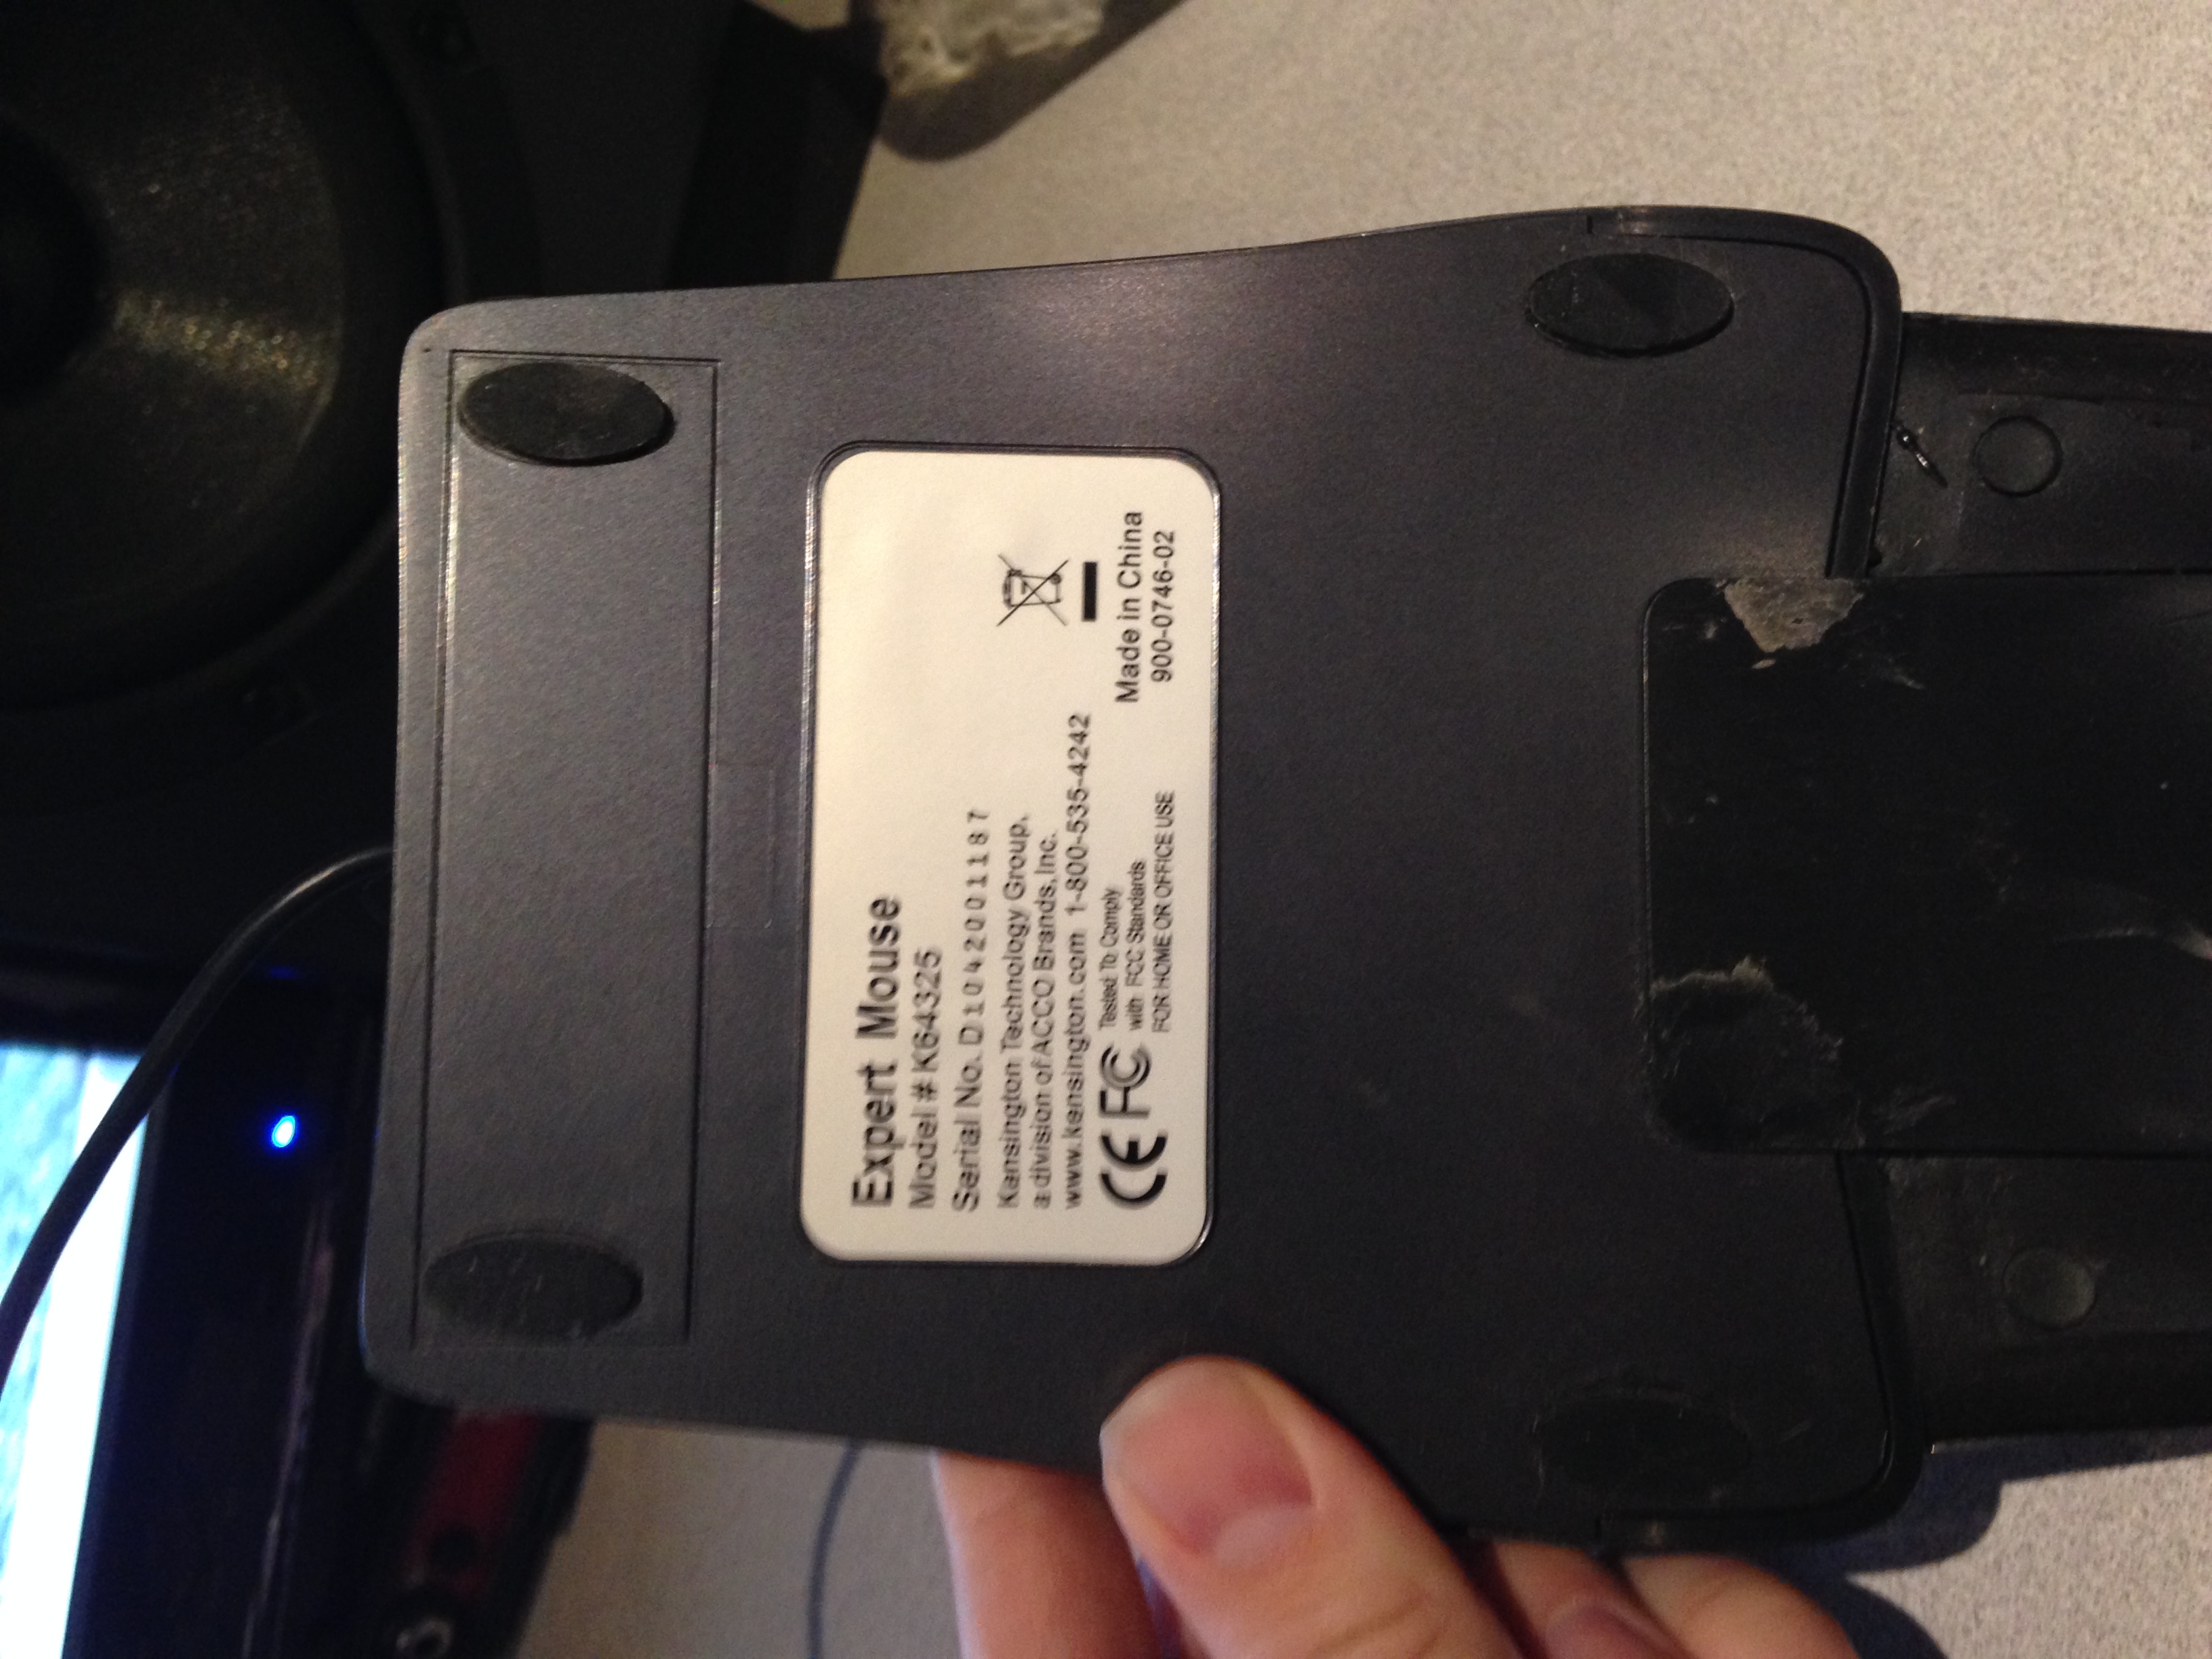
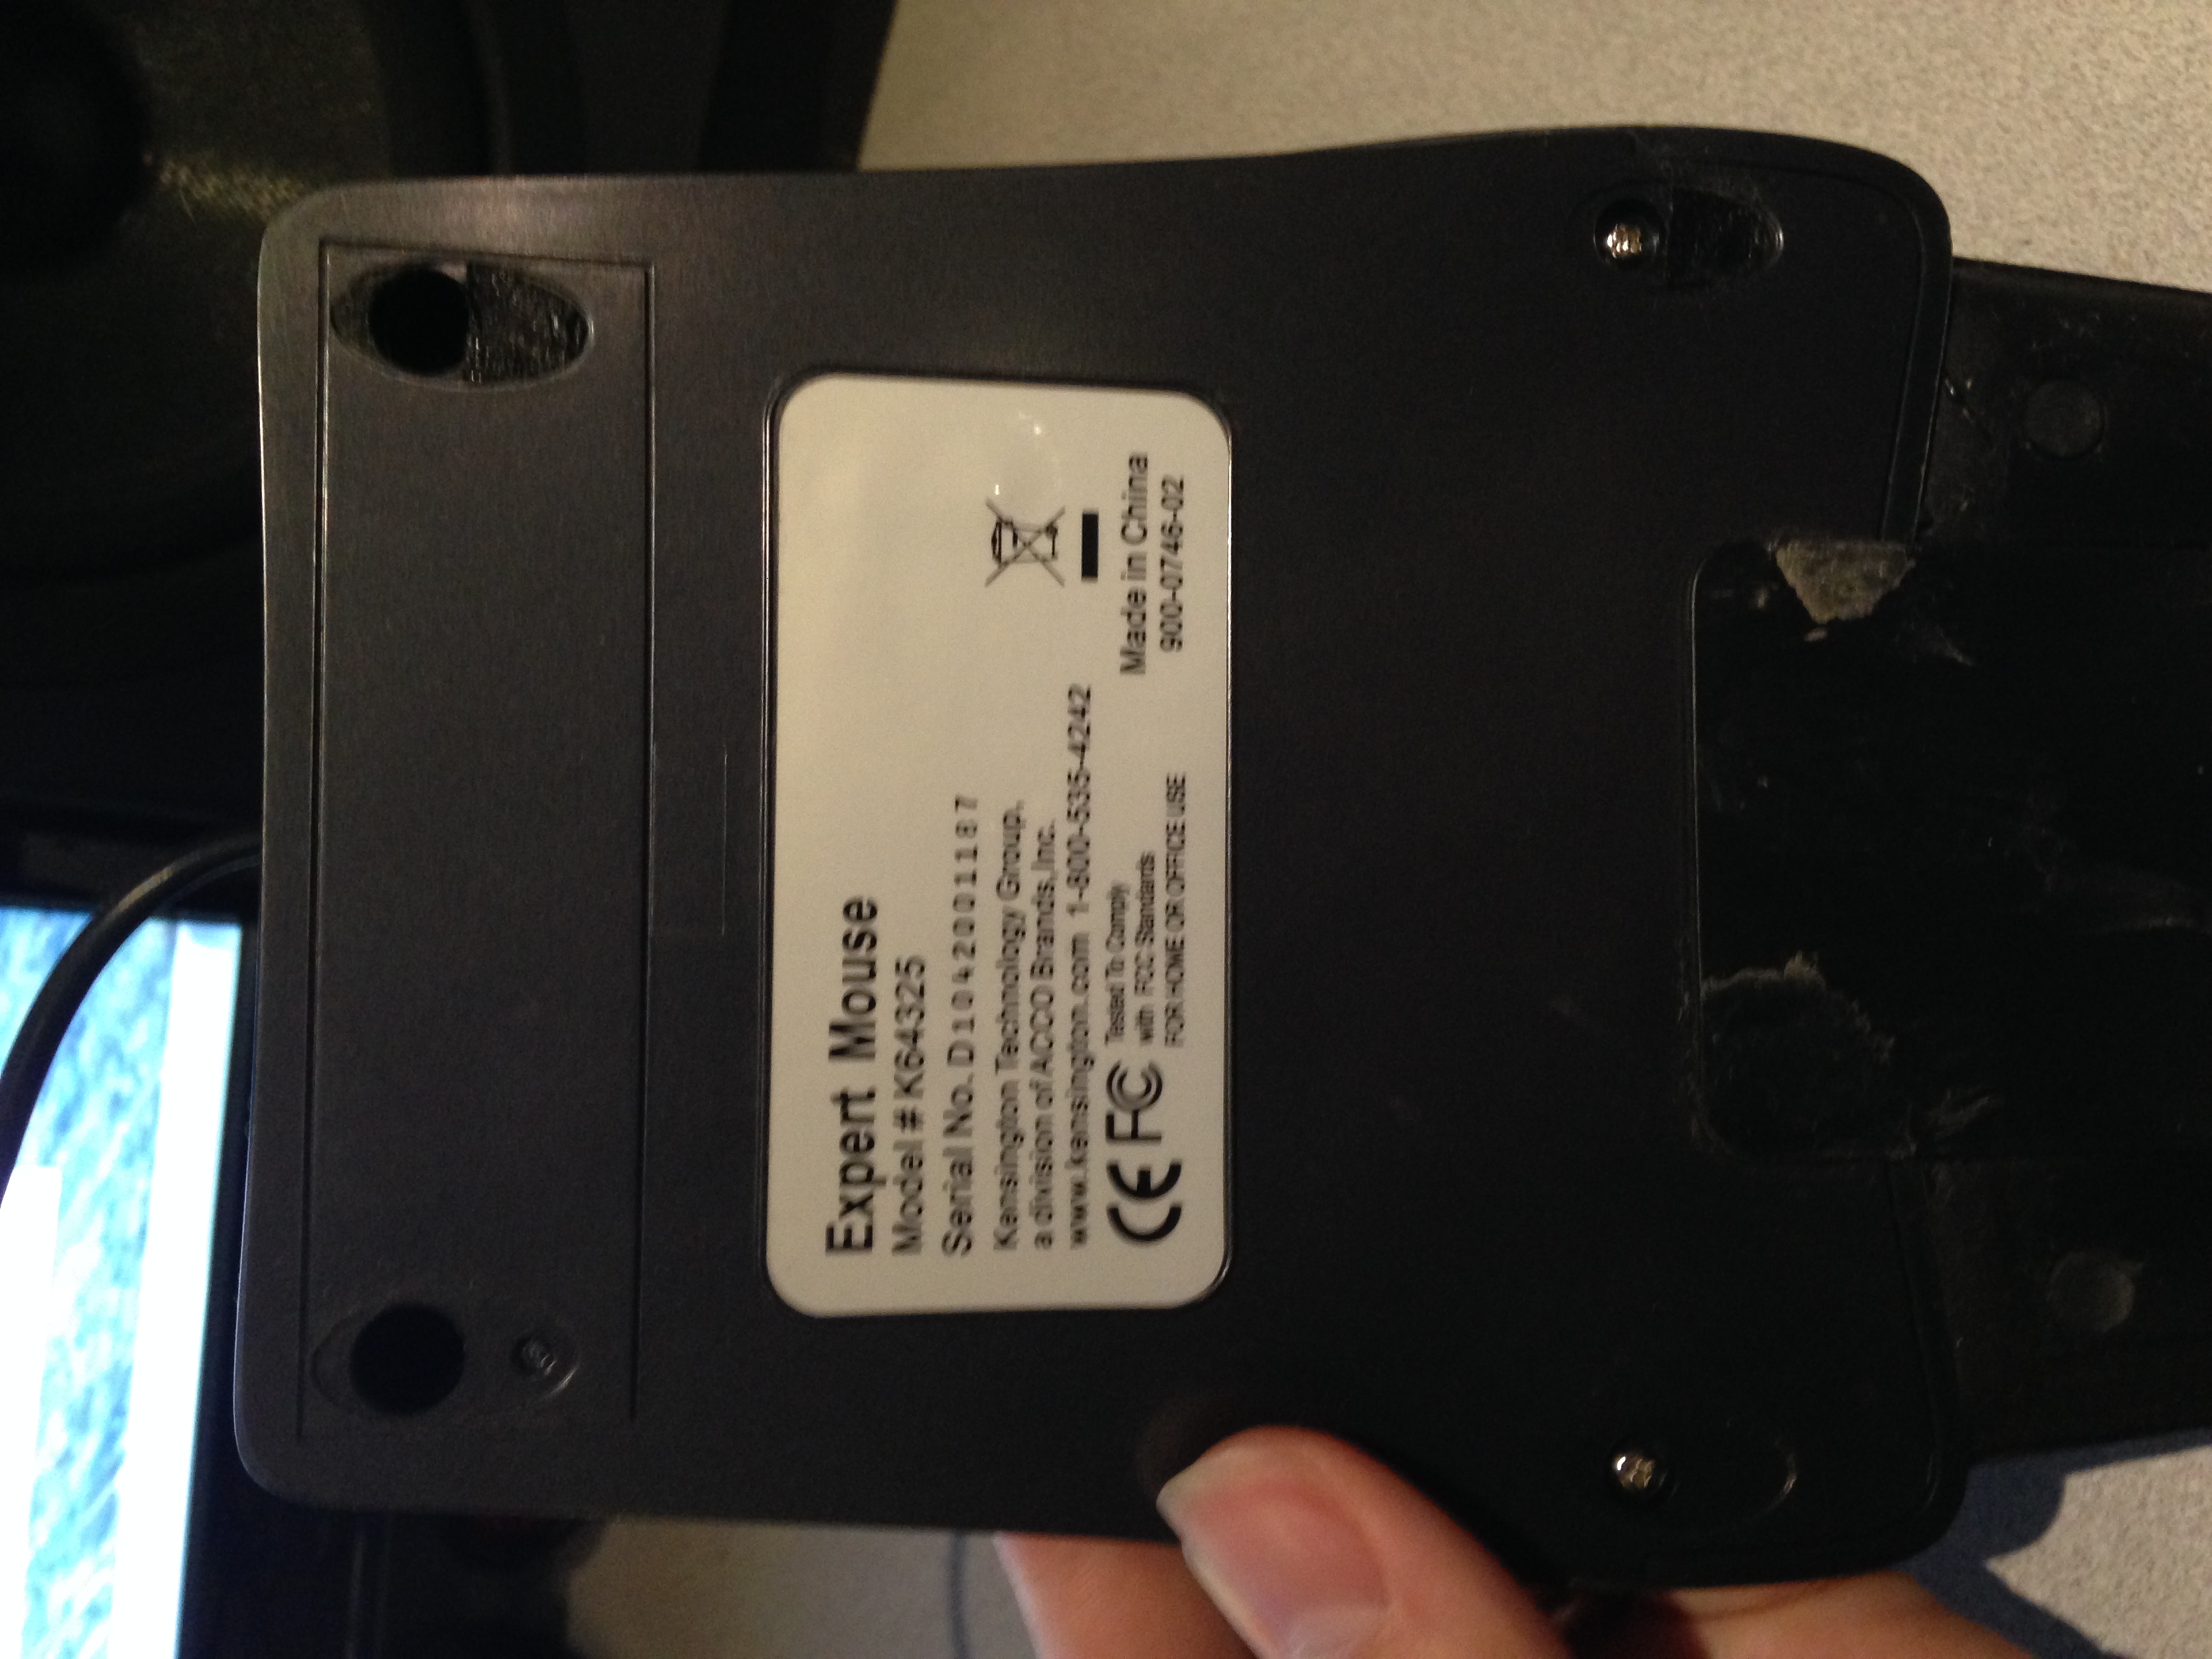
The video showed me how to tear the mouse down. First I located the screws on the back, underneath the four pads. I needed a very skinny phillips screwdriver for the top two.
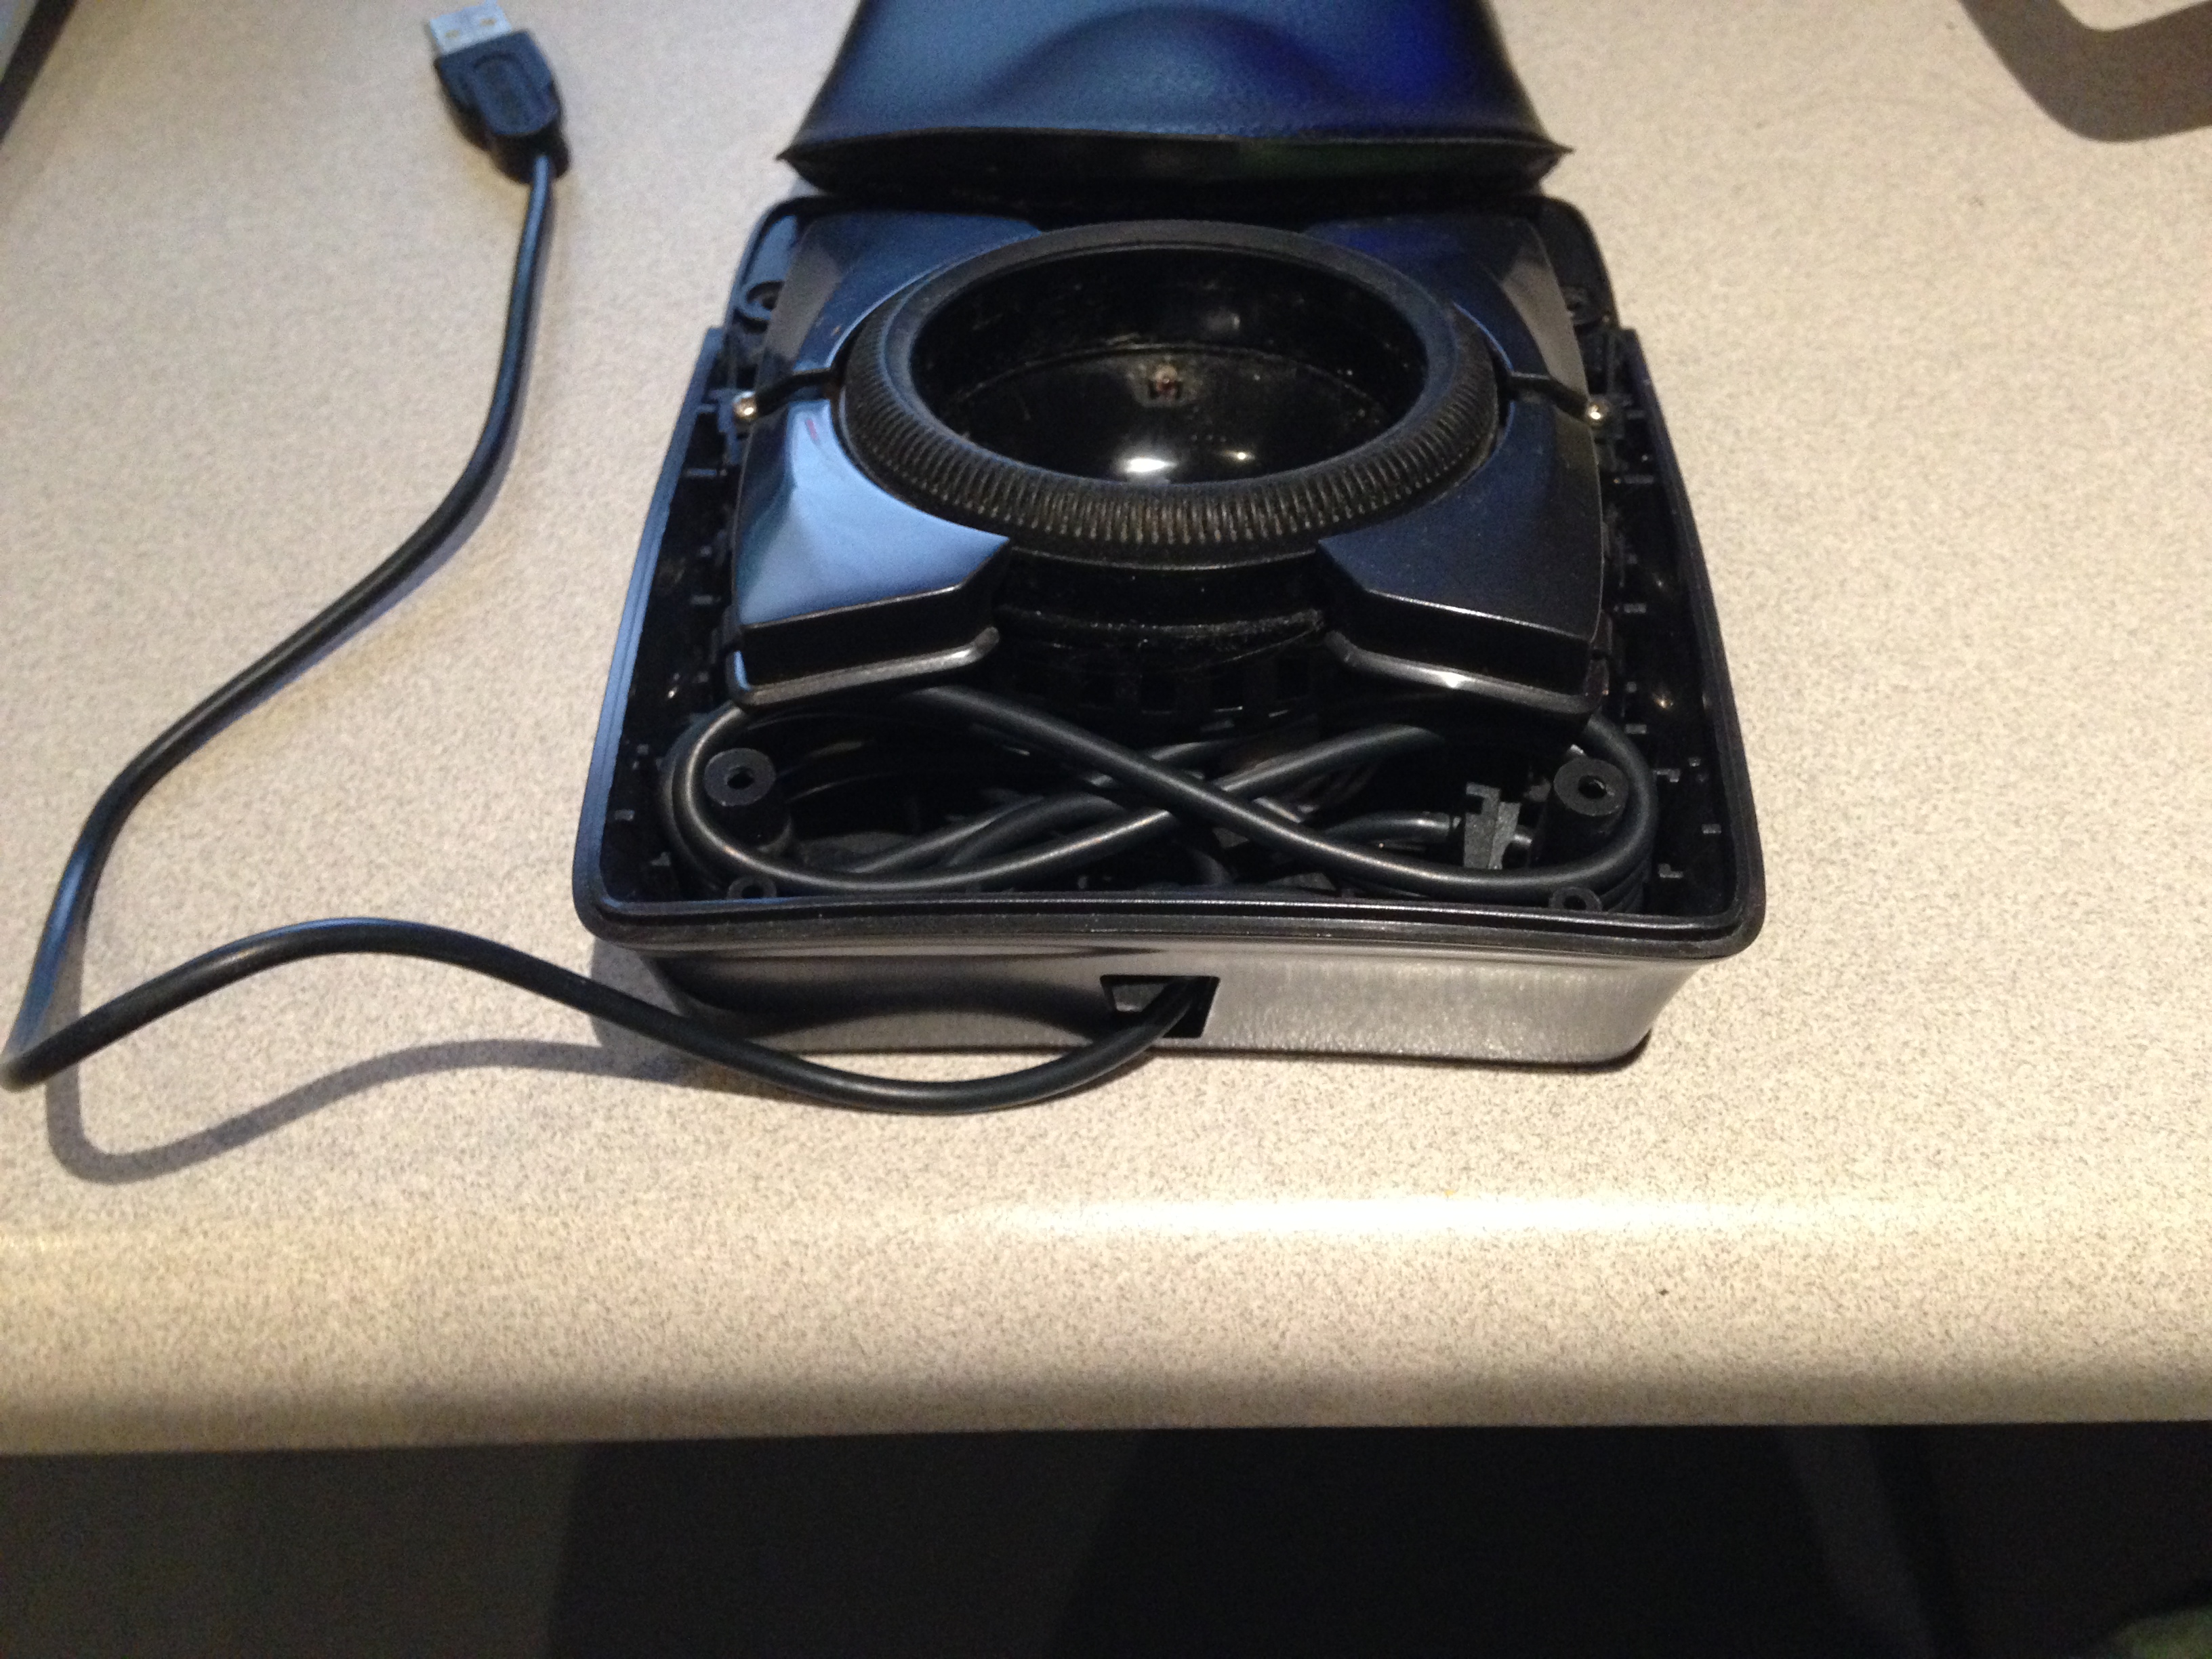
Once those fours screws were removed, the top plate comes right off. Be careful, as the top plate is really thin and has a few pieces that could snap off easily if forced.
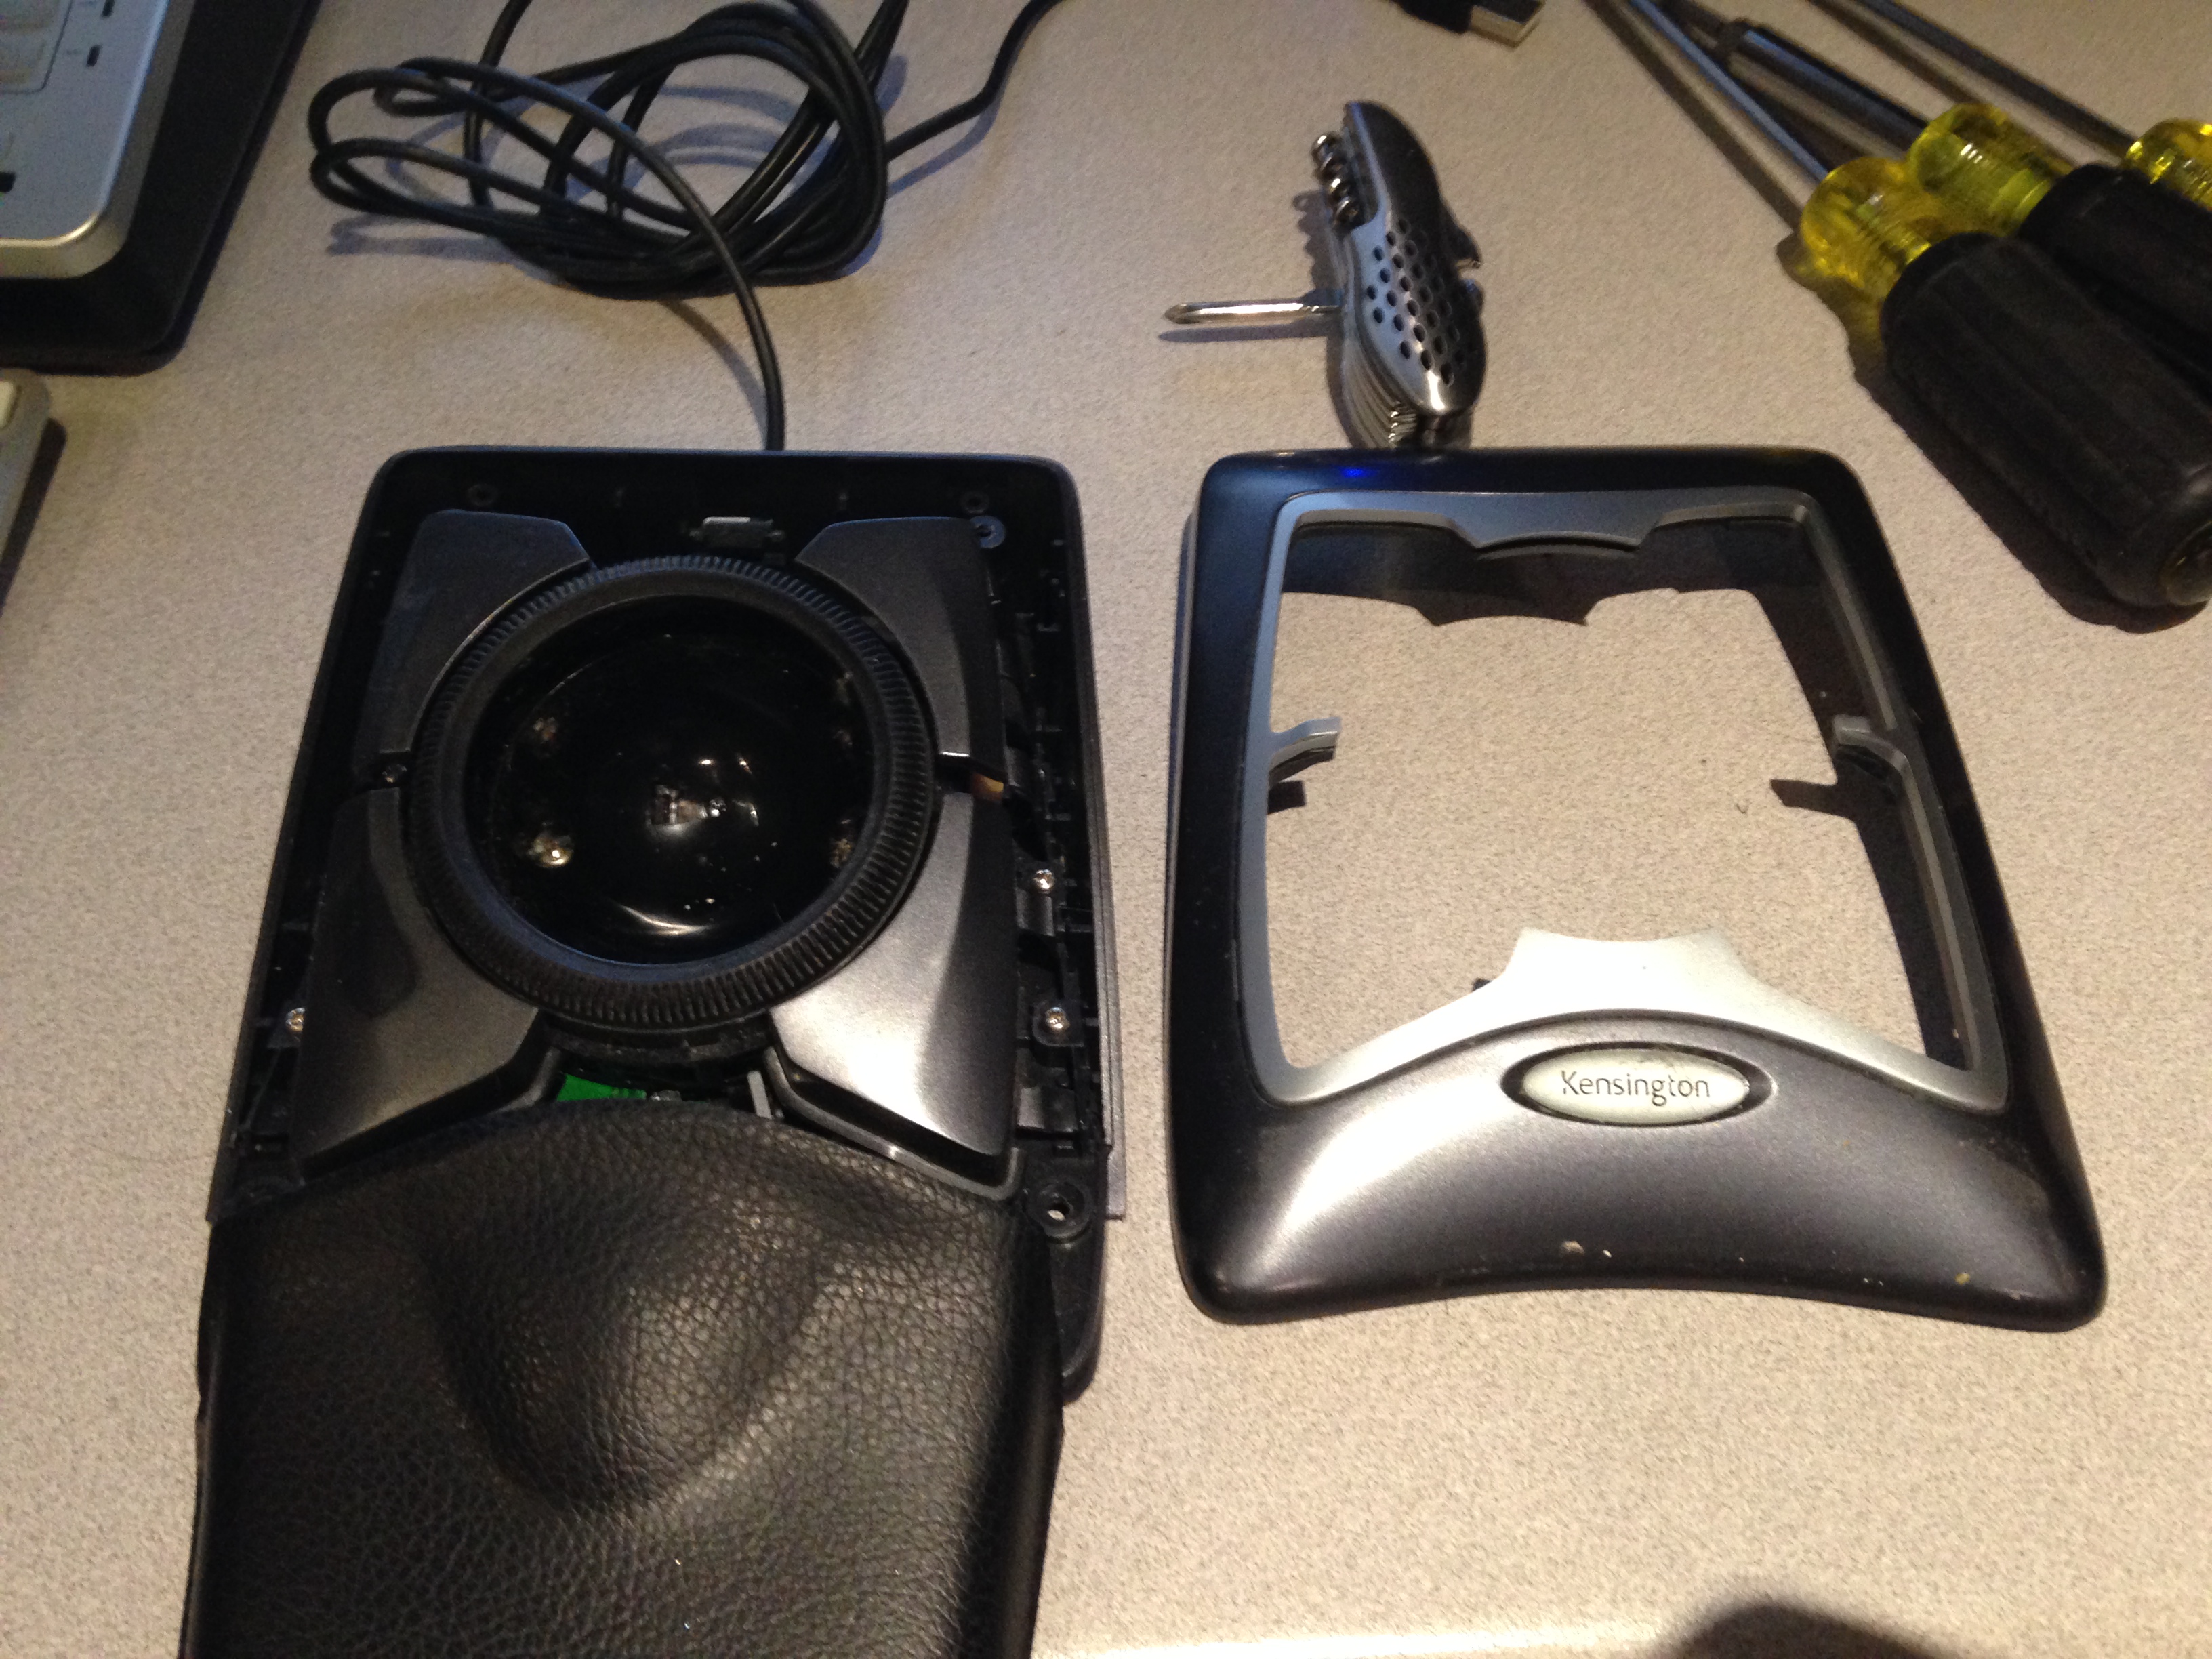
There is a small piece of plastic/rubber that acts as a stop to make sure rowdy people don’t rip the cable out the back (while they are swinging it around their heads?…who knows.) Anyway, I figured that I could slide the cable through this slowly to adjust to the desired size. However, this didn’t work. It didn’t budge.

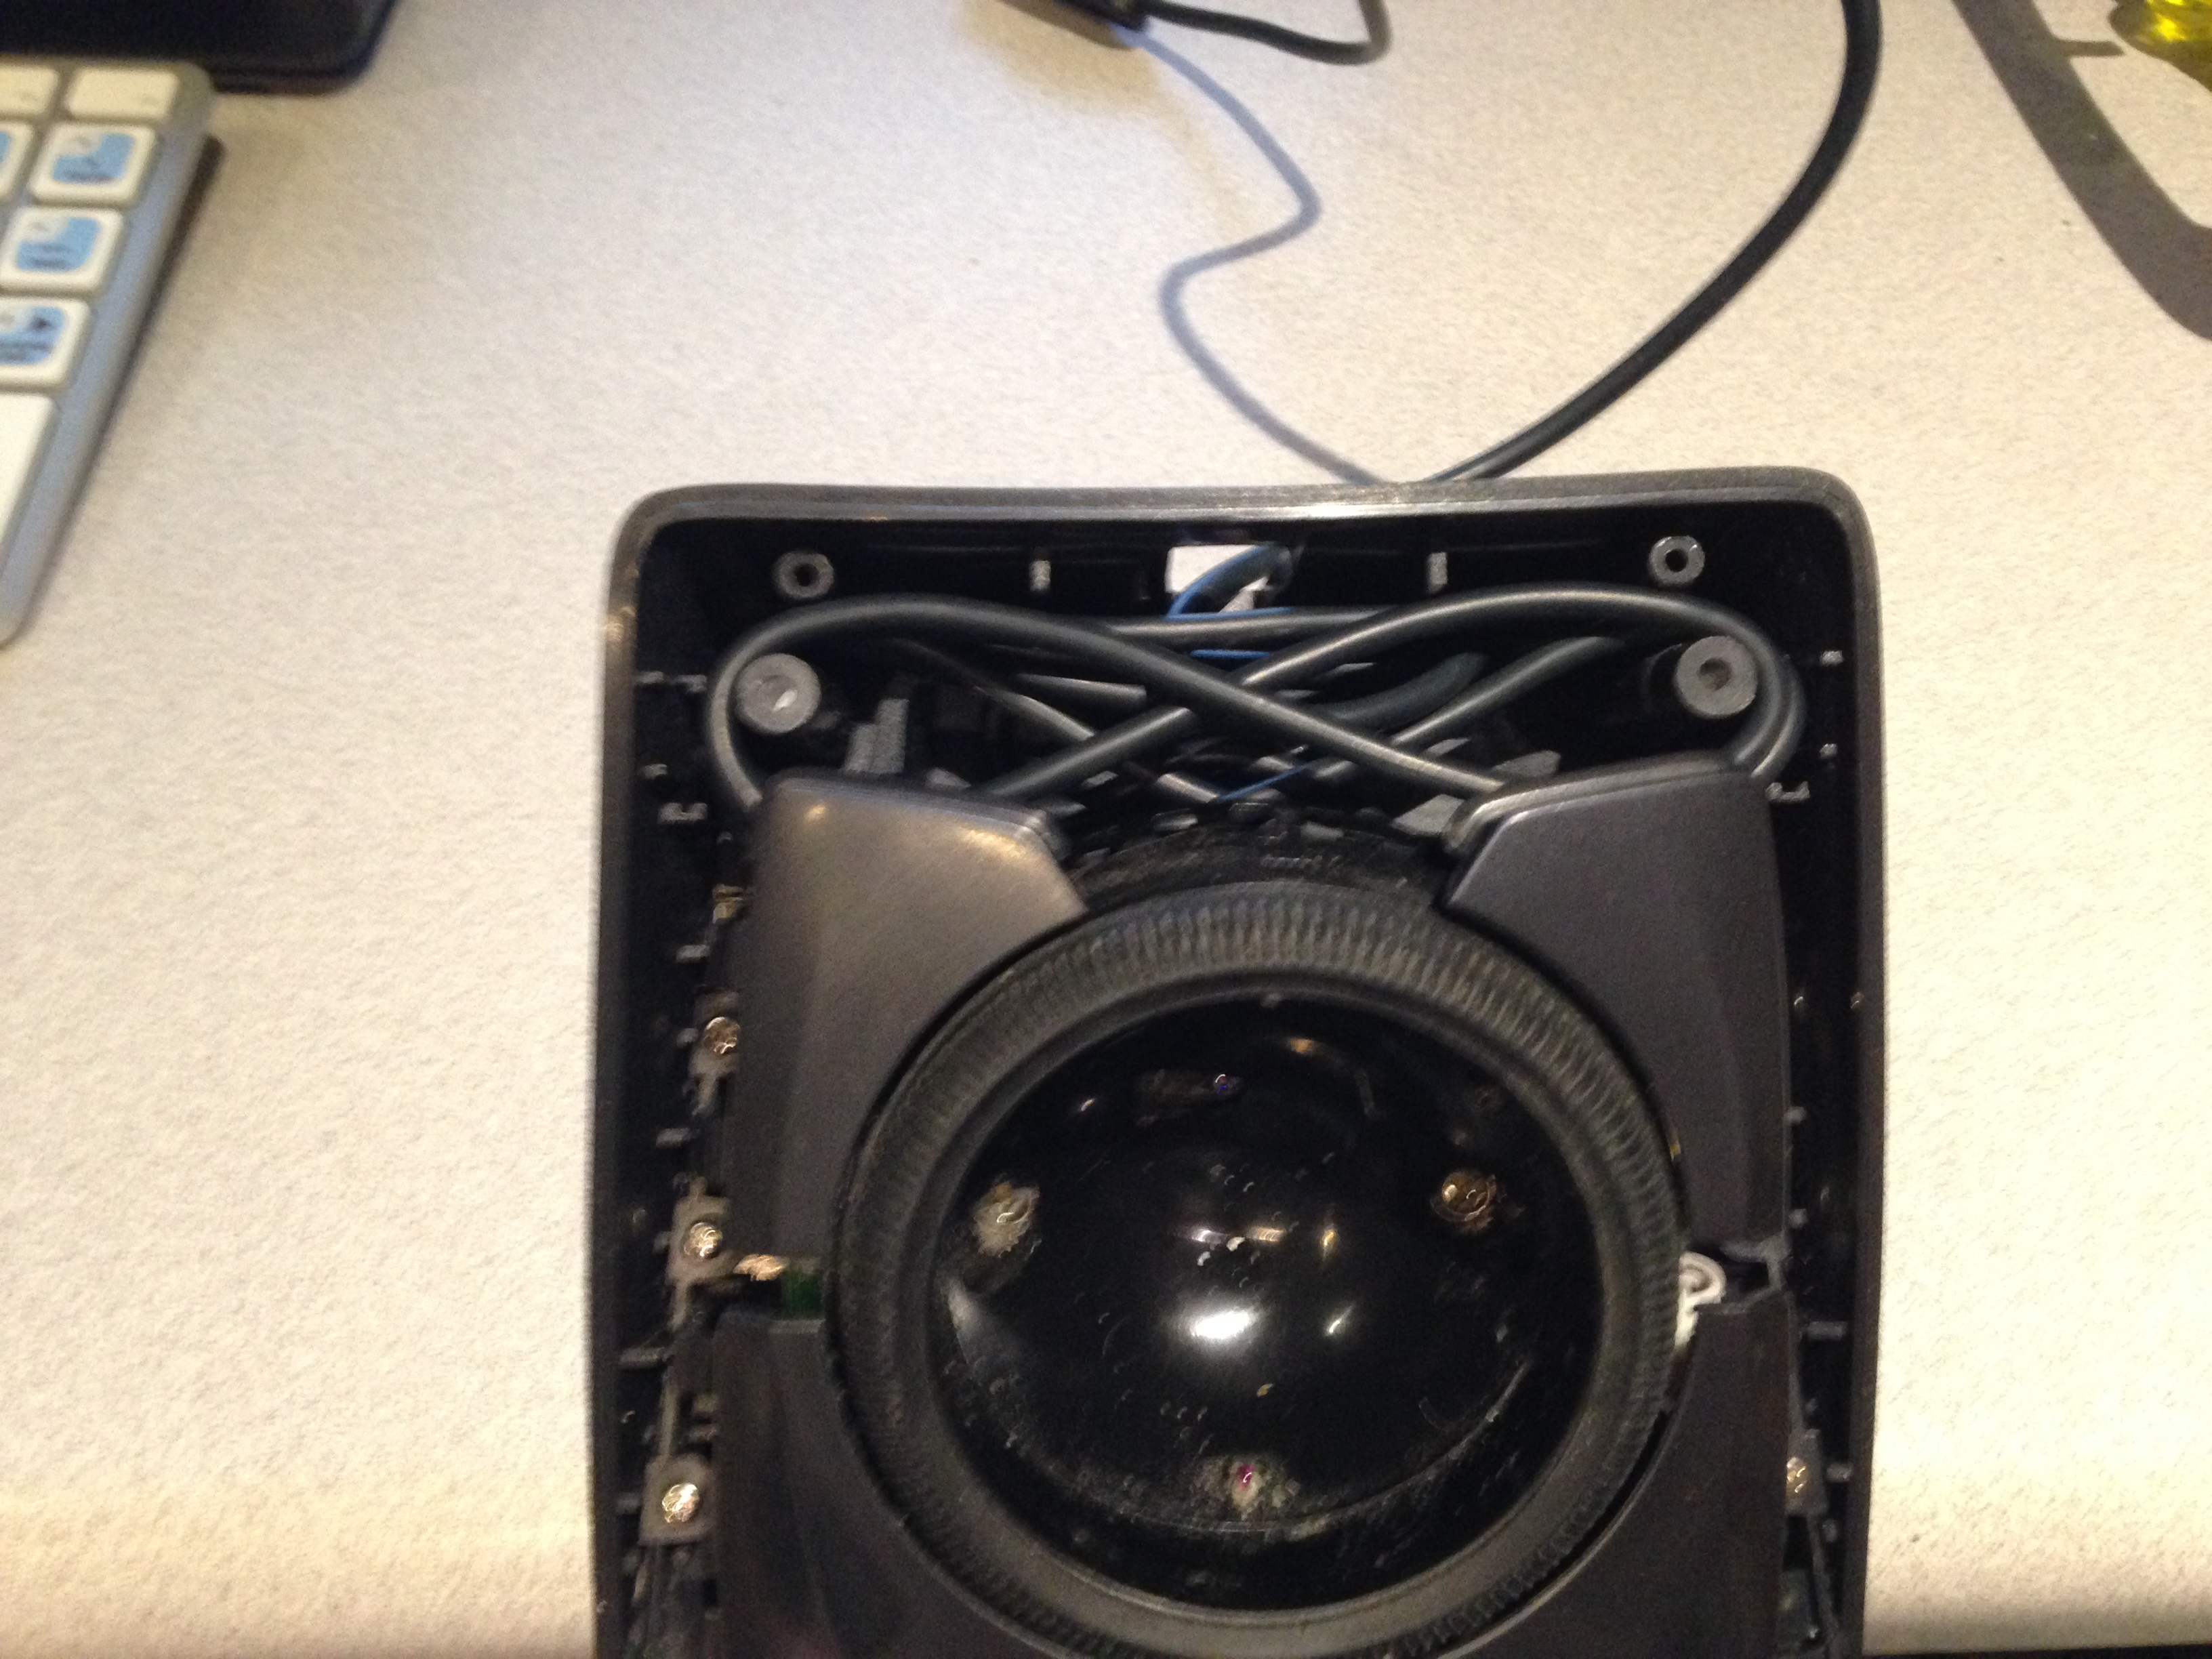
I decided to see if there was enough spare room inside the mouse to also include the “stopper.” There are two conveniently placed plastic screw shafts on each corner of the top so I carefully, with a very light touch as to not damage the insides, wrapped the cable around the shafts. I would push down the cable into the mouse every time I wrapped it to make sure that it left no gaps. I was also careful to make sure it didn’t rub up against anything like the jog wheel (as that friction could shorten the life of the mouse.)
Once I was done wrapping I took a step back to appreciate the finely wrapped work!
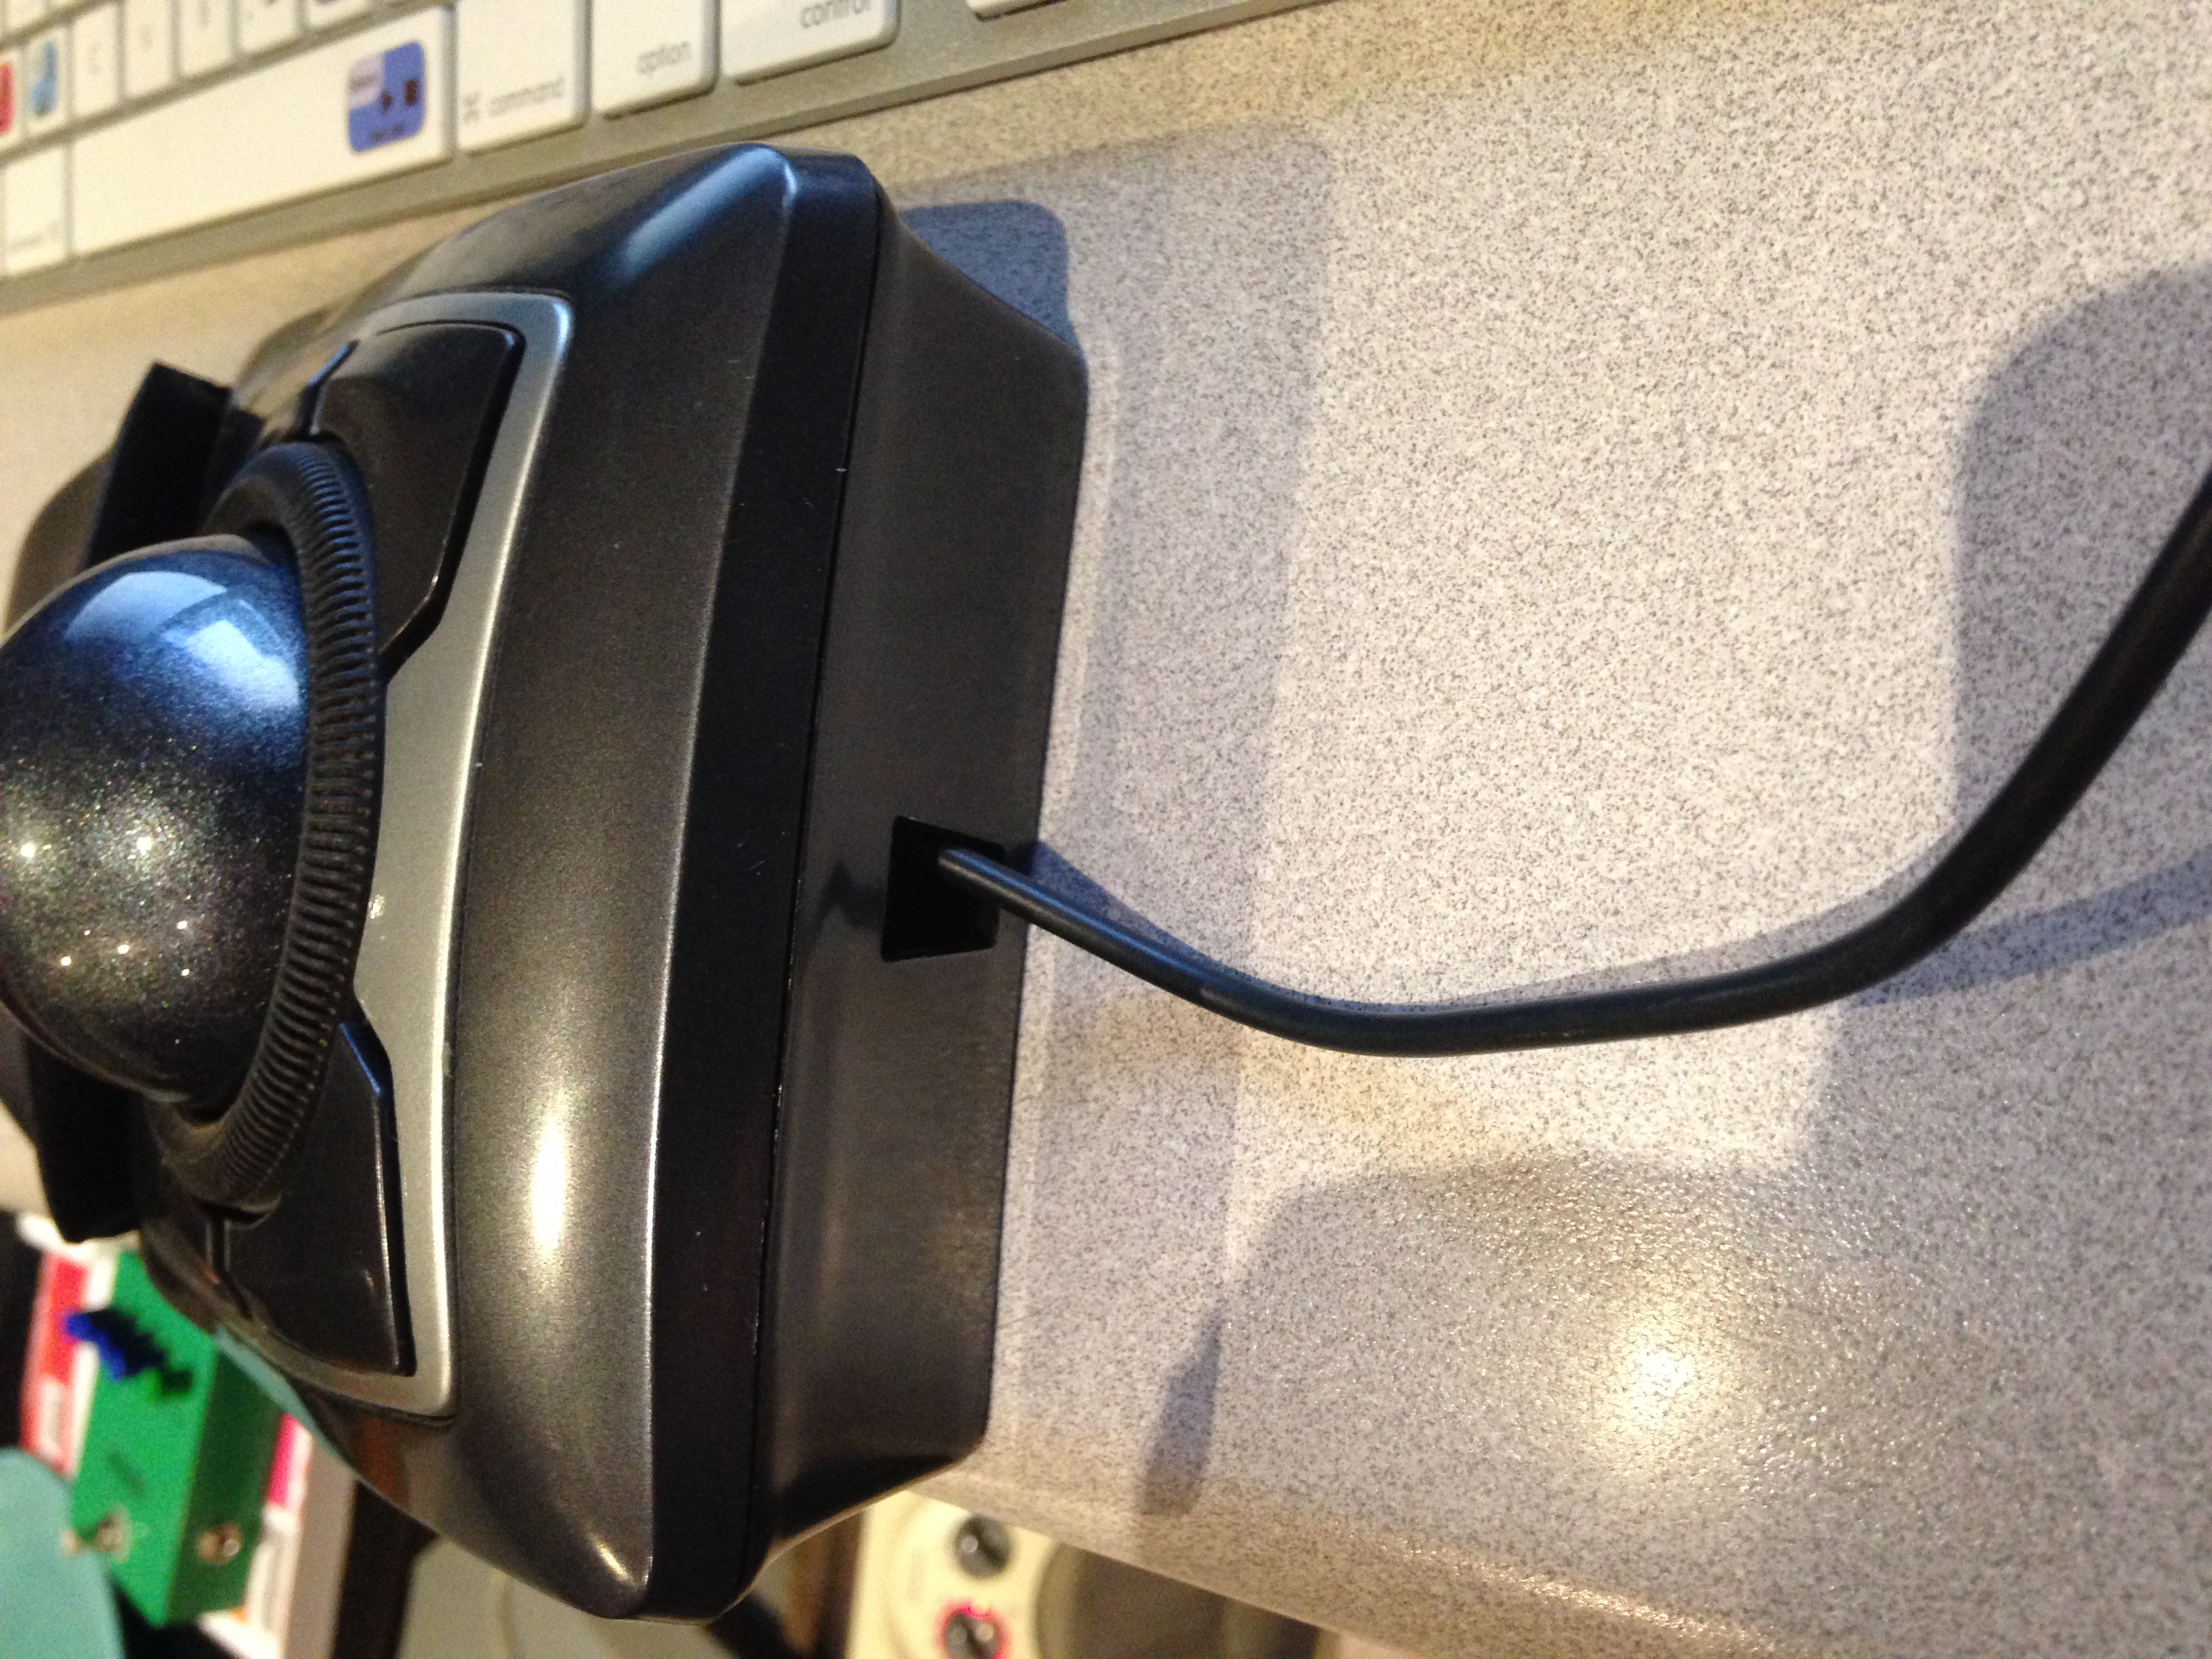
I replaced the screws, cover pads, and the roller ball and plugged it in. Awesome, it still works!

Note that their is no longer an engineered appropriate stopper holding the usb cable securely to the side of the mouse. No swinging it around like a battle flail!
This isn’t a perfect solution. If someone can figure out how to move the cable through the “stopper” I would love to know!